This tutorial gives you a brief idea on how to check RAM speed on your PCs or Macbooks. Besides, the RAM or Random Access Memory carries paramount importance in the computer system. Also, it is one such memory which enables the computer or laptop to perform various functions. The most significant of those is the successful running of software.
Moreover, the RAM is responsible for the proper loading and running of these applications on your device. It also holds the data of these softwares. Besides, it also enables the proper functioning of the system kernel. Now, your device’s RAM must run at a proper speed so that it functions smoothly. Hence, it is necessary that you keep a check on the RAM’s speed. Let us follow some basic steps for checking the RAM speed on both Windows and Mac platforms.
Also, read about Complete Guide: How to Set up Voicemail on iPhone
How to Check RAM Speed

a) For Windows
Method 1: Use third-party software like CPU-Z
If you are uncomfortable with using Command prompt for checking the RAM speed, you can opt for this method. Follow the below-mentioned steps.
1) Install CPU-Z on your PC
You can google for CPU-Z and on the top result, you will find their website. Go through your system requirements and find the version that is best suitable for your device.
2) Run the software
After successful installation, run this software. You will find that it scans your device for a thorough analysis. Wait till this process gets accomplished.
3) Click on the Memory Tab and watch out for DRAM Frequency
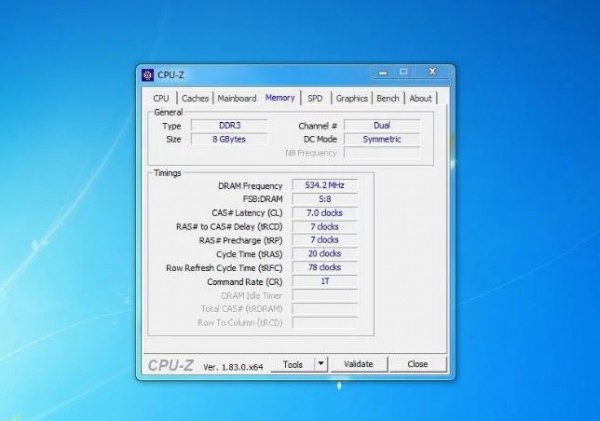
After the analysis, a menu will appear as above. Click on the Memory tab and find out the DRAM Frequency column right at the top. It will display your RAM speed in frequency (MHz). However, if your PC runs at a double data rate, you have to double the frequency for the actual RAM speed.
Method 2: Using Command Prompt
This is a slightly tough method for new users. However, our user-friendly guide makes it relatively easier for you.
1) Open Command Prompt on your device
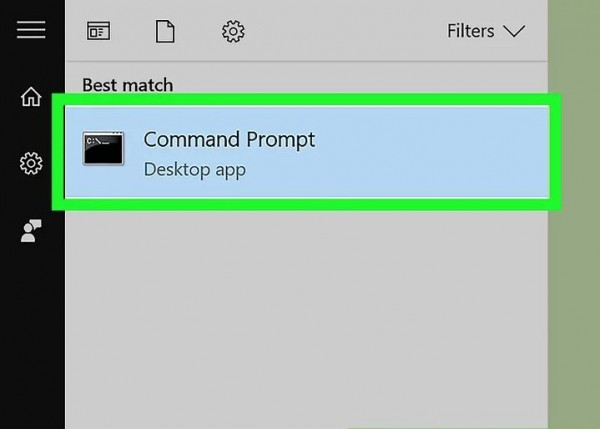
Search for the Command Prompt software on your device. Open the Start menu and click on the Command Prompt software as shown above.
2) Type the command required
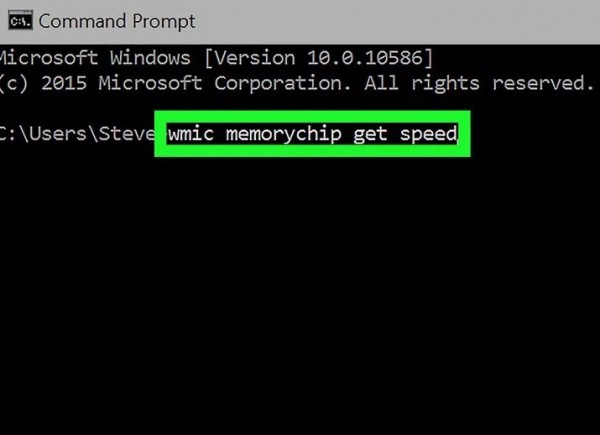
After opening the software, you need to type the command: wmic memorychip get speed. This is the command which is required in order to find the RAM speed.
3) Press enter
After entering this command, press the enter key from your keyboard, be it physical or virtual.
4) Watch out for the chip speeds

After pressing enter, the Command Prompt will show the RAM speeds of every chip on your device. There you go!
Recommended read for you: Best Microphone Apps for your Phone.
b) For Mac
For Macintosh systems, the process is relatively simpler than that for Windows. Follow these steps to check RAM speed on your Mac devices.
1) Open the Utilities file on your device
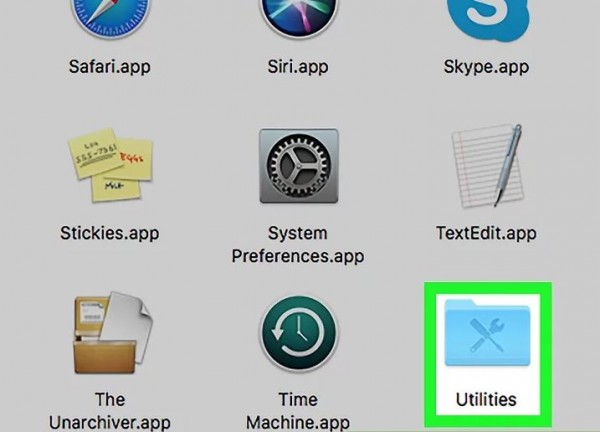
On your Mac device, look out for the Utilities file. You can find this in the Applications parent folder. Click on the file.
2) Click on the System Information App
Afterwards, check out the System Information.app file in the Utilities file and click on it to open.
3) Click on the Memory Tab
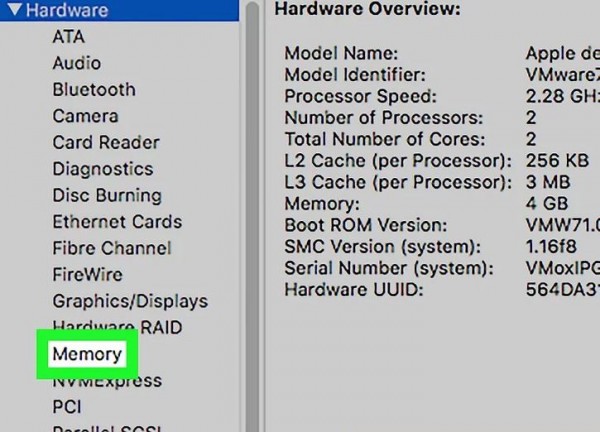
Afterward, there will be a menu on the left side as above. Click on the Memory tab. This tab stores all the data regarding each chip your Mac device possesses.
4) Check the Memory Slots table
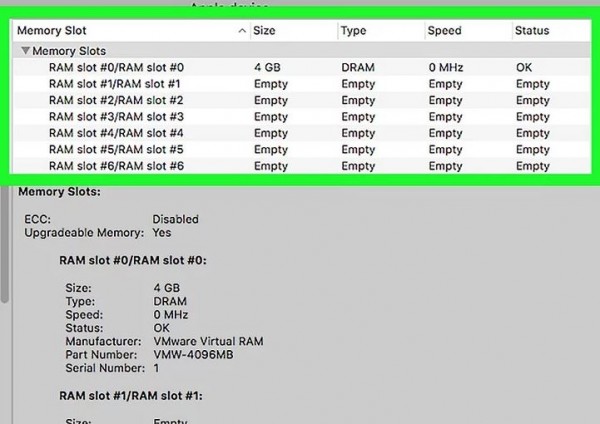
As soon as you click on the Memory tab, a similar tab will appear on your screen. You can check your devices’ RAM speed in the frequency range of MHz. You are ready to roll!

