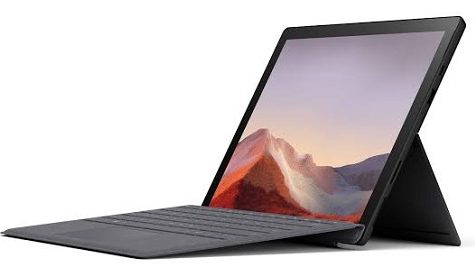
The Microsoft surface pro is a sleek and elegant device. It also packs a hefty punch that makes it a very capable laptop to have on you. The surface pro’s sleek build makes it portable and also makes it look great. But it also forces the laptop to compromise on durability. Thinner laptops are a lot easier to damage, and the modern bezel-less designs that are available nowadays make a laptop even more fragile. A large majority of people end up damaging their laptop’s screen in some way or the other.

The surface pro’s form factor makes the laptop quite susceptible to screen damage. And getting this laptop repaired by a professional can be expensive. This is because a new screen for this laptop is quite pricey on its own. And when you have to pay a repairing fee on top of the cost for the part, you can end up with a hefty bill to pay. Fortunately, laptop screens are also relatively easy to repair. You just need to know how to reach them.
Thanks to the plethora of tutorials and guidelines available nowadays, one can do a lot of things on their own now. Today, we’re going to take you through the process of fixing your surface pro’s screen. You should note that the surface pro’s screen is harder to replace than regular laptops. Breakfixnow advises that you should only perform this repair if you have all the required tools on hand.
Surface Pro Screen Replacement
What Tools Will You Need?
- A heat gun and suction cups to remove the screen.
- A plastic pry tool.
- Plastic opening tool.
- Isopropyl alcohol.
- Strong double-sided tape.
The Process
The surface pro’s screen is secured in place with adhesive. This makes the laptop’s design different from other laptops. It also makes the screen harder to remove than usual. Also, make sure you take pictures of your laptop as you remove things. This way, you can double check everything when you’re reassembling your device.
- Start by preparing your laptop for the removal:
- Make sure that the laptop’s battery is below 25% before you shut it down.
- Assess the condition of your screen. If the screen is extensively cracked, you should cover it with a layer of tape. This will prevent any shards from flying about while you’re removing the screen.
- Take your heat gun and begin applying heat to the sides of your screen. Make sure that you don’t apply too much heat as it can damage your screen. Once the surface becomes hot to touch, you can begin removing the adhesive.
- To remove the adhesive, use either a plastic pry tool or a guitar pick if you don’t have the former. Slide your tool underneath the screen and begin cutting away the adhesive. Throughout the process, you will have to reheat the screen multiple times. Otherwise the adhesive will end up hardening again.
- While you’re slicing away at the adhesive, place a suction cup on the screen’s surface. The suction cup will provide you with leverage without subjecting the screen to any harmful pressure.
- After you separate the screen from the laptop’s body, you will find two ribbon cables connecting the screen with the laptop. Take your plastic opening tool and use it to lift the metal casing connect the ribbon cables to the laptop. Release the left cable first and then the right cable. After this step, the screen will now be completely free from the laptop.
- Now, make sure that the laptop is free of any debris from the previous screen. You can also use isopropyl alcohol to clean off any remaining adhesive from the laptop.
- After you’ve completely cleaned the laptop, you can begin putting the new screen in place. Start by connecting its ribbon cables to the laptop. Make sure that both cables are secure under the metal casings.
- Now take some strong double-sided tape and apply it to the back of the screen. Make sure that you apply it evenly on all 4 sides of the screen. Place the screen on the laptop and gently set it into place.
The entire process will take you and hour or two to complete. The most time-consuming part is removing the damaged screen. You need to take extra care that you don’t end up damaging your laptop’s internals during this process.
It may sound like a daunting process, but being able to repair your laptop is a pretty useful skill. You will have complete control over your device throughout the process. This means that you won’t have to worry about your data. And neither will you have to worry about your laptop not being available for an entire week. And the best part will be that you’ll be able to save a decent amount of money by avoiding repairing fees.
